You can add several different types of content to objectives in VISION. After you have decided how to classify an objective, follow these directions to add content to it. These are they types of content you can add to an objective:
Also, see Tips for Adding Content.
Steps for Developing Word Content
1.Double-click on the objective to open its properties, and click on the Content page.
2.Select a Classification from the drop-down menu. If you are unsure of which to select you can click the Advisor button for more information or select the Free Form classification.
3.Click the Word Actions drop-down menu and select "New Document".
4.Your Word document will open. Type or paste in content. When you are finished, save the document and close it.
5.VISION will confirm that you wish to save your changes. Click Yes.
6.Click on the Word Actions menu again and choose "Convert Document to HTML".
7.A Content box will pop up. Enter a title for the content so that you will be able to recognize it in the future. Click OK.
8.A pop-up will appear to confirm that the content was converted successfully, click OK.
 Publish Word Content for the VISION Learning Station
Steps for Developing PowerPoint Content
Double-click on the objective to open its properties, and click on the Content page.
1.Double-click on the objective to open its properties, and click on the Content page.
2.Select a Classification from the drop-down menu. If you are unsure of which to select you can click the Advisor button for more information or select the Free Form classification.
3.Click the PowerPoint Actions drop-down menu and select "New Document".
4.Your PowerPoint presentation will open. Type or paste in content. When you are finished, save the document and close it.
5.VISION will confirm that you wish to save your changes. Click Yes.
6.Click on the PowerPoint Actions menu again and choose "Convert Presentation to MP4 Video" (or convert to HTML if using Office 2010).
7.A Content box will pop up. Enter a title for the content so that you will be able to recognize it in the future. Click OK.
8.A pop-up will appear to confirm that the content was converted successfully, click OK.
 You can still convert your PowerPoint content to HTML if you are using a version of Office no older than Office 2010. If not, you must convert it to MP4 instead.
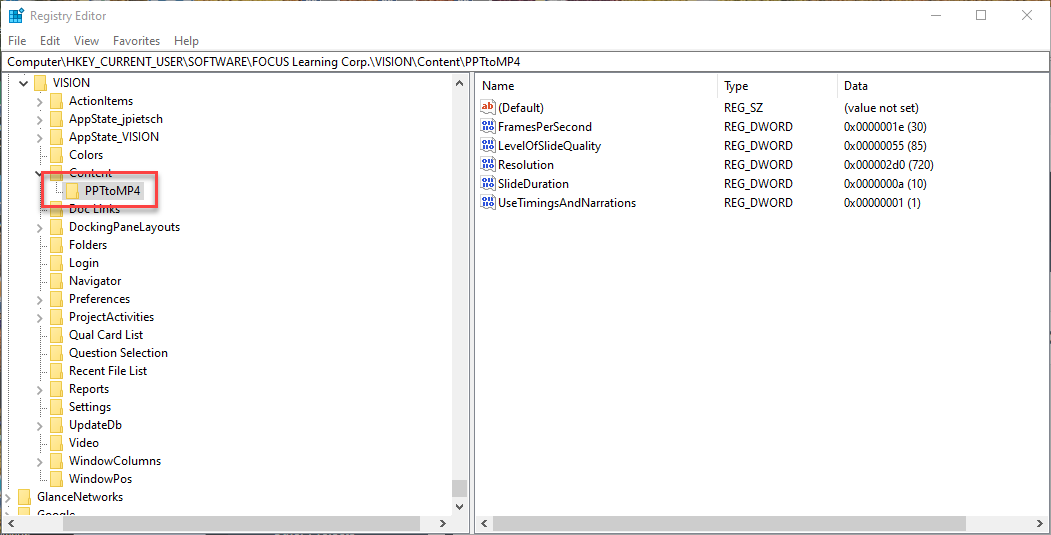
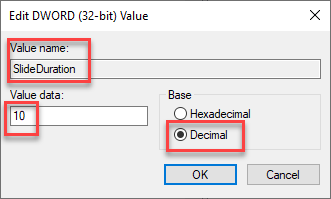
 When you convert a PowerPoint to MP4, VISION will ONLY use the default values. To edit default values, see "PowerPoint Best Practices".
Publish PowerPoint Content for the VISION Learning Station
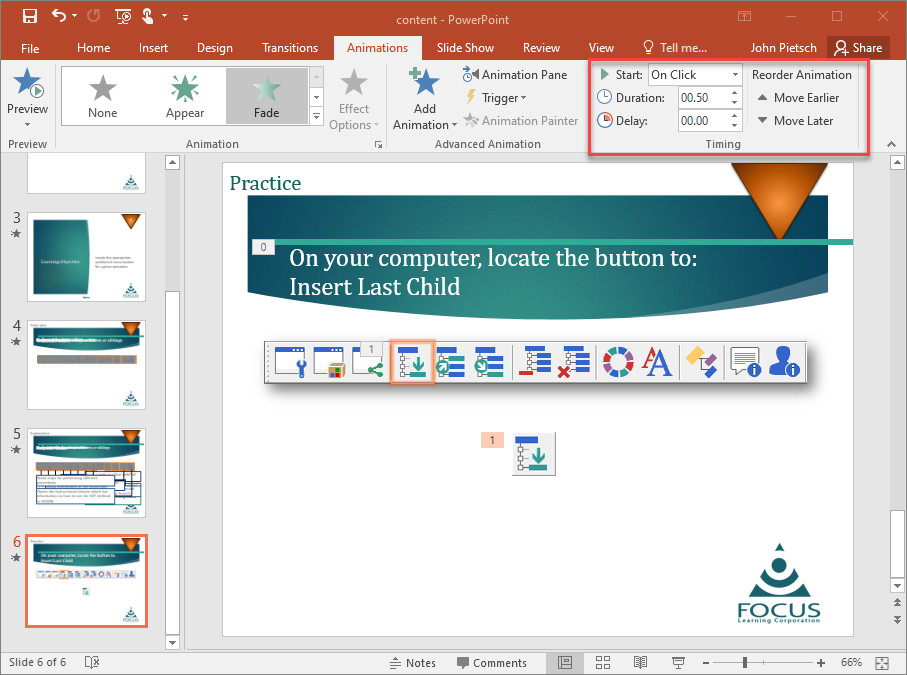
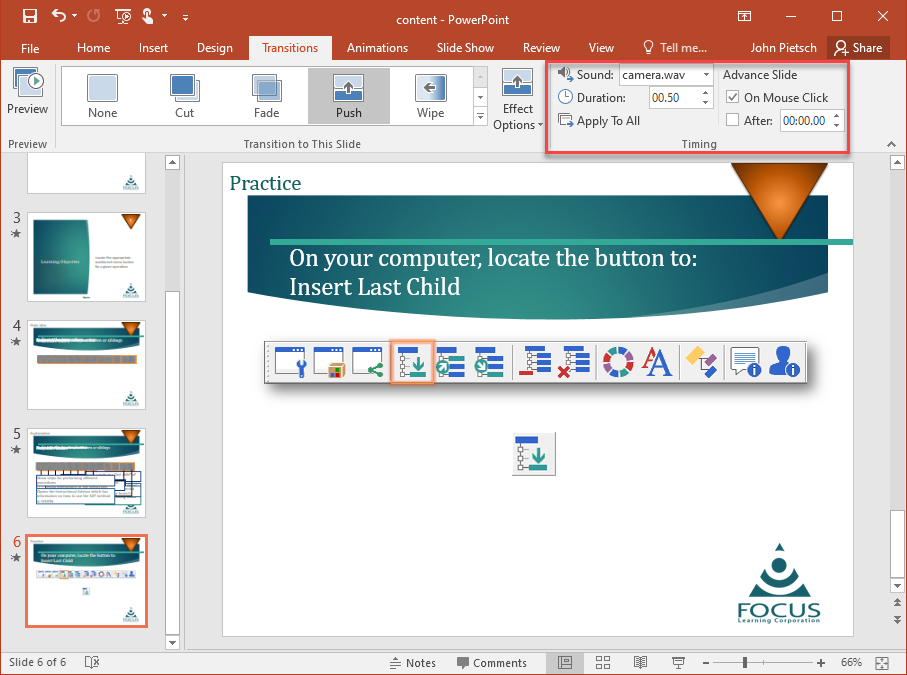
Best Practices for Converting PowerPoint to MP4
Add Video Content
Use the "Video" dialog to specify a video that you wish to present as objective content in the Learning Station. Note that you don't author the video here, it must already exist. Here, you embedded the video in an HTML page that is defined by the "template" you select, combined with the title and text that you enter.
VISION supports Flash, QuickTime, Real Media, Windows Media, and YouTube.
Follow these steps to assign video content to an objective in VISION Developer:
1.Have your video file ready at an http address that you can access through VISION (You don't author the video here, you just give the http address of the video and select some presentation options).
2.Open VISION Developer and navigate to the objective that you want to attach this video content to.
3.Double-click on the objective to open it, and click on the Content page.
4.Select a Classification from the drop-down menu. If you are unsure of which to select you can click the Advisor button for more information or select the Free Form classification.
5.Near the bottom of the tab, click on the Web Module Actions drop-down menu.
6.Hover over Add and choose the Video option.
7.A Content box will pop up. Enter a title (this will display only in the "Web based learning content modules" list).
8.The Video window will pop up. Enter the video's "Document Properties". These control the .html wrapper that will appear around the video, but not the video itself.
a. Title: Optional. This title appears on the HTML page that presents the video object, in the place designated for the title by the template. This is a fully formatted (RTF) text field. You may wish to center the title, enlarge it, color it, etc.
b.Text: Optional. This text appears on the HTML page that presents the video object, in the place designated for the text by the template. You can enter a description of the video, instructions, or whatever seems appropriate. This is a fully formatted (RTF) text field. You may wish to center the text, enlarge it, color it, etc.
c.Template: This is the file that supplies the .html wrapper in which the video is embedded. If you are adding a template, click the Apply button and use the browser to locate it. Once the template is applied, it it saved in VISION with the video content. Note that if it has been changed since the last time you used it, the 'Last Applied' text will appear in red. To upload the newer version, just click the Apply button.
9.Next, enter the Video Properties:
a.Video Address: Enter the HTTP address of the video here. The address needs to be an Internet-style address. A file-system path (example: \\server1\directory\video.mov) won't work. For Flash videos, the address may have configuration settings appended to it, such as color values. For the other video types, the address is strictly the address, terminating in the video file name.
b.Video Type: Select the type of video here. The video file name extension may indicate the type. Typically: .mov = QuickTime; .ram = Real Media; .wmv = Windows Media. Note that to play MP4 files you would select Windows Media or the Real Media player depending on which program is loaded onto learner’s computers.
c.Flash Options: If using a Flash video, select additional Flash options here.
i.Compatibility: If the video needs to be playable in older versions of Flash, indicate that here.
i.Playback Quality: Choose the video quality here.
ii.Colors: Colors 1 and 2 are blended to color the Flash control bar and frame border (if the border is present).
iii.Show border: A check mark here causes a border to display around the whole perimeter of the Flash video. The border is colored according to a blend of colors 1 and 2.
d.Width: If you know the video's proper width, enter it here. Otherwise, consider experimenting a little with different widths, using the Preview button to view it before you commit. Note that if Show controls is selected you may need a wider width to show them.
e.Height: If you know the video's proper height, enter it here. Otherwise, consider experimenting a little with different heights, using the Preview button to view it before you commit. If "Show controls" or "Show border" is on, the video's total height will be greater.
f.Show controls: This setting governs whether a control bar appears beneath (and attached to) the video pane. The control bar includes controls such as play, pause, rewind, volume, etc. Note that the control bar is always included for Flash videos.
g.Auto start: Whether the video starts playing automatically.
h.Loop playback: Whether the video plays in a continuous loop, automatically starting again each time it reaches the end.
10.When you are finished, click the OK button or the Preview button to review your video.
Using Copy/Paste for Video
You can copy video hosted on a website (such as YouTube) and use the Paste button to install this video in the objective content object.
1.First click on the "Embed" text on the video's web page page.
2.Then press Ctr-C on the keyboard, or click the right mouse button and choose "Copy" from the menu. Copy only the "Embed" text, not the"URL" text, which is suitable only for viewing the video on its website, not in an independent web page.
3.Now you can return to VISION and click the Paste button on the Video dialog. That will fill in the Video Properties with the info for the video.
Only the Video Properties partake in the Copy and Paste operations. The Document Properties do not participate.
See Video Content for more information on this workscreen.
When you have finished adding the file, be sure to publish this content for online delivery.
See Video Content for more information on this workscreen.
When you have finished adding the file, be sure to publish this content for online delivery.
Add Custom HTML Content
If you are adding Articulate or Captivate content, please use this procedure instead: Publish Articulate or Captivate.
Follow these steps to assign HTML content to an objective in VISION Developer:
Note that publishing HTML from programs like Captivate or Articulate require a different procedure.
1.Create a folder in a place that you can get to from VISION Developer. VISION will remember and reopen the last folder that a user has gone to for content, so you may wish to designate a specific folder for all of your content.
2.Open the HTML folder and rename the .htm file to “index.htm”. VISION is programed to open the file named "index".
3.You must also add a JavaScript code to your custom HTML to let VISION know when a learner has started and has completed the lesson. This is described below in Add JavaScript Code.
4.Open VISION Developer and navigate to the objective that you want to attach this HTML content to.
5.Double-click on the objective to open it, and click on the Content page.
6.Select a Classification from the drop-down menu. If you are unsure of which to select you can click the Advisor button for more information or select the Free Form classification.
7.Near the bottom of the page, click on the Web Module Actions drop-down menu.
8.Hover over Add and choose the Custom HTML option.
9.VDM will inform you that the JS code snippet mechanism has changed to support modernization of VLS. Click OK
10.First you will be asked to save, and then a content box will open for a Title and a Description.
11.Enter a title for the content so that you will be able to recognize it in the future. Click OK.
12.A browser will pop up. Browse to the folder in which you saved your HTML file.
13.Select the Index.htm file and click the Open button.
14. A pop-up will appear to confirm that the content was converted successfully, click OK.
15. To confirm that you published the correct files, you can click the Web Module Actions drop-down menu and select Preview.
16.Be sure to Approve the objective when it is ready for delivery to students.
Add JavaScript Code
Add JavaScript Code
This JavaScript code can only be used for HTML that has a beginning page AND an end page. Add each marker below the title, in the Head section of the html. The first (Index) marker informs the Learning Station that this content is custom Html, so that VLS will lock the internal navigation and prevent learners from bypassing the content. the end marker then informs VLS that the user has reach the end of the custom html content, and can now be allowed to resume the rest of the lesson, unlocking the VLS internal navigation.
You can open HTML with notepad or a similar basic editor. Right click on the HTML and select Notepad, or choose a different app.
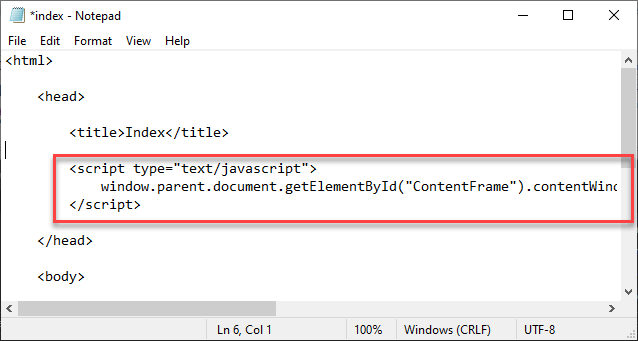
Index (First page) Marker
This script below should be placed on your index page (the first or landing page), or which ever page you use to add this content in the VISION Developer module.
<script type="text/javascript">
setTimeout(() => {window.parent.postMessage('customHTMLStarted', '*');}, "250");
</script>
End Marker
This script below should be placed wherever you want the learner to regain access to VLS navigation, for example, on the last page of HTML content.
It's important to note that by just placing it in the script tags, it will fire as soon as this page is loaded. If you'd rather grant access to proceed on a condition (such as the click of a button), you can place the code in a function (example below) and call it whenever you'd like.
<script type="text/javascript">
setTimeout(() => {window.parent.postMessage('customHTMLFinished', '*');}, "250");
</script>
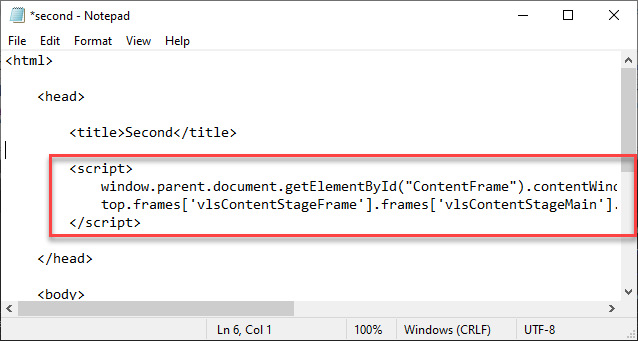
Function Example
When you have finished adding the file, be sure to publish this content for online delivery.
Add PDF Content
Follow these steps to assign PDF content to an objective in VISION Developer:
1.Create a folder in a place that you can get to from VISION Developer. VISION will remember and reopen the last folder that a user has gone to for content, so you may wish to designate a specific folder for all of your content.
2.Open VISION Developer and navigate to the objective that you want to attach this PDF content to.
3.Double-click on the objective to open it, and click on the Content page.
4.Select a Classification from the drop-down menu. If you are unsure of which to select you can click the Advisor button for more information or select the Free Form classification.
5.Near the bottom of the page, click on the Web Module Actions drop-down menu.
6.Hover over Add and choose the PDF option.
7.A Content box will pop up. Enter a title for the content so that you will be able to recognize it in the future. Click OK.
8.A browser will pop up. Browse to the folder in which you saved your PDF file.
9.Highlight the file and click the Open button.
10. A pop-up will appear to confirm that the content was converted successfully, click OK.
11. To confirm that you published the correct files, you can click the Web Module Actions drop-down menu and select Preview.
When you have finished adding the file, be sure to publish this content for online delivery.
Add AICC Content
Not only can you use VISION to deliver external AICC course content, but you can package VISION content as AICC for export to an external LMS.
Setting up AICC Files:
1.In the .AU file, there is a file name parameter. This parameter must be a fully qualified URL to the initial lesson page. This URL has to represent an URL address that the VISION Learning Station server and the client would know how to process. Additionally, the hosting server has to be set up as a Web server that can deliver the requested URL.
2.The “web launch” parameter in the .cst file (section) must say “CMI=API”.
3.VISION will only accept the four mandatory AICC files (.au, .crs, cst and .des) of the seven AICC file types possible. The optional files that end in .ort, .pre or .cmp will not be used and therefore do not need to be saved or uploaded into VISION.
Connecting AICC files:
Follow these steps to assign AICC content to an objective in VISION Developer:
1. Create a folder in a place that you can find, and which you can get to from VISION Developer and save your AICC files there.
a.VISION will remember and reopen the last folder that a user has gone to for content, so you may wish to designate a specific folder for all of your content needs.
2.Open VISION Developer and navigate to the objective that you want to attach this AICC content to.
3.Double-click on the objective to open it, and click on the Content menu item.
4.Select a Classification from the drop-down menu. If you are unsure of which to select you can click the Advisor button for more information or select the Free Form classification.
5.Near the bottom of the menu item, click on the Web Module Actions drop-down menu.
6.Select Add Other Module and choose the AICC option.
7.A Content box will pop up. Enter a title for the content so that you will be able to recognize it in the future. Then click OK.
8.A browser will pop up. Browse to the folder in which you saved your AICC files.
9.Highlight all four of the required files (.au, .crs, .cst, and .des) of the lesson and click the Select button. VISION does support files other than these four. If your lesson came with additional files (.ort, .pre, .cmp) do not select them.
10.Click the Open button.
11. A pop-up will appear to confirm that the content was converted successfully, click OK.
Note that the “Preview” option is not available for AICC lessons. You should be able to view the lesson when it is connected to the VISION Learning Station.
Creating AICC Files out of VISION Developer content:
1.Create a Course node in the Program hierarchy.
2.As a child of the course node, create one or more Training Units of the type “Instruction and Exam”, “Instruction Only”, or “Cognitive Exam Only”.
3.Sequence the objectives containing questions and/or content into the lessons as appropriate.
4.Set any lesson prerequisites as are necessary.
5.Highlight the Course node containing the lessons to be delivered via AICC.
6.From the menu select Outcomes and then VISION Report.
7.Select the Development menu item, and run AICC Course Export.
8.Save the AICC files to a local folder for later upload to your LMS.
When you have finished adding the file, be sure to publish this content for online delivery.
Add External URL Content
Follow these steps to assign web address content to an objective in VISION Developer:
1.Open VISION Developer and navigate to the objective that you want to attach this HTML content to.
2.Double-click on the objective to open it, and click on the Content page.
3.Select a Classification from the drop-down menu. If you are unsure of which to select you can click the Advisor button for more information or select the Free Form classification.
4.Near the bottom of the page, click on the Web Module Actions drop-down menu.
5.Hover over Add and choose the Web Address option.
6.First you will be asked to save, and then a content box will open for a Title and a Description. Note that this description will be presented to the learner as "instructions" when they encounter this content though the VISION Learning Station.
7.Enter a title for the content so that you will be able to recognize it in the future. Click OK.
8.A text box will pop up. Enter the web address (URL). Note that you can enter a query string as well.
9. A pop-up will appear to confirm that the content was converted successfully, click OK.
10. To confirm that you published the correct files, you can click the Web Module Actions drop-down menu and select Preview.
11.Be sure the Deliver and Deliverable checkboxes are set correctly.
12.Remember to Approve the objective.
External URL or Custom HTML?
This type of content differs significantly from VISION's 'Custom HTML' content. You would use Custom HTML content to upload and present HTML files to the Learning Station, whereas Web Address files have already been uploaded to the internet. You are only making a link to them, which VISION will use to import the content when a learner accesses it though the Learning Station.
For example, if you want to upload an HTML lesson from your desktop to the VISION Learning Station, you would use Custom HTML. If you wanted to present diagrams from your company's website in a Learning Station lesson, you would use Web Address.
External URL Limitations
External URL will add content to a VISION Learning Station lesson directly from the web address (URL) that you provide. Unfortunately, due to malicious practices like 'Clickjacking', which steal data from websites and internet users, many websites use security that will prevent the VISION Learning Station from embedding their web pages in a lesson. When this happens, VISION Learning Station will lock its internal navigation (so the learner cannot proceed through the lesson) and present instructions to the learner along with a "Launch External Content" button. When the learner clicks this button, a new window will open to the external content URL. Once the learner has finished and closes the external content window, the Learning Station lesson will unlock and the learner may resume it.
When you enter the URL string of the website's address you can also add a "query string". In this example, the query string is bold:
https://www/example.com/over/there?name=ferret&color=purple
When you have finished adding the file, be sure to publish this content for online delivery.