Expanding and Collapsing a Hierarchy Tree
Insert Hierarchy Nodes (Without the Assistant)
Detach and Reattach Hierarchy Branches
Move, Copy and Share Hierarchy Nodes
View Only One Part of a Hierarchy
Steps to use the Show Parent Feature
Opening a Hierarchy Workbench
In order to do most of the Instructional Design activities that VISION supports, you will need to open a Hierarchy Workbench. One way to open a Hierarchy Workbench is to use the Main Menu. From the Main Menu, select Workbench. Then choose the type of Workbench you want. Each type of Workbench opens a different combination of hierarchies.
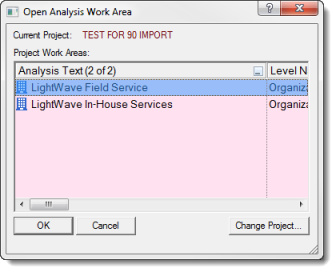
If the Open... Work Area window appears, highlight a Project Work Area and click the OK button. Note that this selection box does not appear if there is only one work area in the project of the given type (Analysis, Objective or Program). If there is only one, VISION opens it automatically.
When you open the hierarchy, it will look like this:
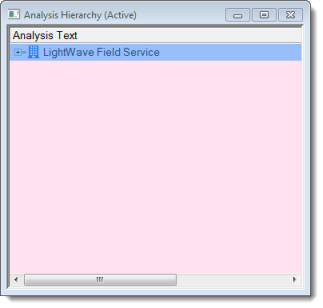
In this example, the Workbench shows the Analysis Hierarchy for a Work Area called “LightWave Field Service”. All that you can see at this point is the top, or “parent” node of the hierarchy. The  symbol indicates there are more nodes, or “children” below the parent.
Expanding and Collapsing a Hierarchy Tree
Expanding One Level
To expand a node one level, click the button for the node. Alternatively, you can press the <Enter> key.
 When you click either the Plus button or Minus button
  , you only need to click it ONCE. Clicking twice will leave you right where you started.
Collapsing a Node
To collapse an expanded node, click the button or press the <Enter> key.
When you click either the Plus button or Minus button , you only need to click it ONCE. Clicking twice will leave you right where you started.
Expanding a Branch
To expand a branch, select Node ![]() Expand Branch from the Main Menu or select Expand Branch from the right mouse button menu. Please note that for very large branches, this operation can take some time to complete.
Expand Branch from the Main Menu or select Expand Branch from the right mouse button menu. Please note that for very large branches, this operation can take some time to complete.
Expanding the Entire Hierarchy
To expand the entire hierarchy, select Node ![]() Expand All from the Main Menu or select Expand All from the right mouse button menu. Please note that for large hierarchies, this operation can take some time to complete.
Expand All from the Main Menu or select Expand All from the right mouse button menu. Please note that for large hierarchies, this operation can take some time to complete.
Insert Hierarchy Nodes (Without the Analysis Assistant)
If you want to know how to insert hierarchy nodes WITH the Analysis Assistant, see Analyze a Job Position.
'Insert As...' Terminology
To understand how VISION defines components, the following terms are important:
•Parent: The component (or node) that is the immediate superior of the subject node, in a hierarchical sense. Every hierarchy node has a parent, except the root node.
•Insert As Child: The node will be inserted as a subordinate, or one level below the subject node.
•Insert As Sibling Above: The node will be inserted on the same level as the subject node. The new node will be placed directly above the subject.
•Insert As Sibling Below: The node will be inserted on the same level as the subject node. The new node will be listed directly below the subject node.
Check Spelling
By default, auto spell checking is turned on. Auto spell checking will automatically check spelling when you edit any multi-line text box in a Properties workscreen. The spell check occurs when you exit that text box or click OK. If you prefer, you can turn auto spell checking off at any time, by doing the following:
1.From the Main Menu, select Setup ![]() Preferences.
Preferences.
2.Uncheck the "Auto spell check text fields" check box.
3.Press OK.
To manually spell check any field, press the <F7> key once you are done entering text in the field.
Steps to Insert Hierarchy Nodes (Without the Assistant)
To insert a new hierarchy component:
1.Highlight the node in the hierarchy you want to insert something under or next to.
2.From the Workbench Toolbar click one of the following buttons: Insert As Child, Insert As Sibling Above or Insert As Sibling Below.
a.Alternatively, from the Main Menu or right-click menu, click Node ![]() Insert then one of the previous options. See the Example for more details.
Insert then one of the previous options. See the Example for more details.
3.If you selected the "Insert As Child" command and you are inserting the first child, a window will appear asking you to pick the level name for the child you are inserting. Highlight the desired level name and click the OK button.
4.Type the new component in the text field that will be displayed.
5.Click the OK button. When you are finished, you can resolve any spelling problems by using Spell Check.
See Also
Delete Hierarchy Components
 Warning: This operation is permanent! When you delete a branch, ALL nodes within the branch (descendents) are also deleted. Consider Unlinking it instead.
Follow these steps to delete one or more hierarchy components:
1.Highlight the node you want to delete from the hierarchy.
2.Click the Delete Branch button on the Workbench toolbar. Alternatively, you can select Node ![]() Delete from the Main Menu.
Delete from the Main Menu.
3.In the "Confirm Delete" window, click the "Yes" or "Yes to All" button.
Confirm Delete
What happens when you click the "Yes" button?
VISION will check each node in the branch to see if it shared. If the node is NOT shared, it will be deleted. If the node IS shared, the node will be unlinked for the current position only. Consider the following example:
Detach and Reattach Hierarchy Branches
Detach (Unlink) a Branch of a Hierarchy
When you unlink a branch from a hierarchy (as opposed to deleting it) the branch will be moved to the Recycle Bin so that it can be used later. Follow these steps to unlink a node or branch from a hierarchy:
1.Highlight the branch to be detached.
2.There are three ways to unlink a node:
a.From the Workbench toolbar you can click the Unlink Branch button. 
b.Click the right mouse button; click Unlink Branch from Hierarchy.
c.Select Node ![]() Unlink Branch from the Main Menu.
Unlink Branch from the Main Menu.
3.The Confirm Unlink window will appear after you select Unlink Branch, displaying the top hierarchy node that you wish to unlink. Although more than one node may be selected, only one node at a time is shown.
4.Click Yes to unlink the node or branch. If more than one node is selected, you may click Yes to All to place all nodes and their children in the recycle bin.
a.If more than one node is selected, clicking the No button cancels the operation for only the currently selected node identified at the top of the window.
b.The Cancel button will quit the entire operation for all selected nodes.
If the node you are detaching is not shared, the node will be placed in the appropriate Recycle Bin. If it is shared, it will simply be removed from that location, and will remain in its other locations, but it will not be placed in the Recycle Bin.
Reattach (Link) a Hierarchy Branch from the Recycle Bin
Once you have removed a node or branch from a hierarchy, you may wish to reattach it elsewhere. These instructions will guide you through that process.
1.Be sure the hierarchy (Analysis, Objective, Program) you wish to use is the active hierarchy (click anywhere in the hierarchy to make it active).
2.Select Project ![]() Recycle Bin from the Main Menu, and then select the appropriate bin.
Recycle Bin from the Main Menu, and then select the appropriate bin.
3.Drag the item(s) from the bin to a target node of the active hierarchy.
4.When the Confirm Drop dialog box appears, choose Last child, Sibling above or Sibling below (in relation to the target node in the hierarchy). Click OK to confirm the placement of the node.
Irregularities, such as incomplete data imports, can lead to data items that are neither in the hierarchy nor in the Recycle Bin. They’re just "floating" in the project, as it were, yet they can still turn up in searches and reports. These items are referred to as orphans. When they turn up in a search (for example, the Objective Orphans search), you can drag them from the search results list into the hierarchy.
Move, Copy and Share Hierarchy Nodes
Move
A Move operation moves one or more hierarchy components from one location in the hierarchy to another. Moving a "parent" component automatically includes all of its "children" in the move.
Copy
A Copy operation does just that: VISION duplicates the hierarchy component (and all of its children) at another location in the hierarchy. A copy is created that is independent of the original. A subsequent change to copy will not affect the original, and vice-versa.
Share
A Share operation makes a component appear in another location, without removing it from its original location. This means that at first glance, sharing might appear indistinguishable from copying, but it is important to understand how sharing differs from copying.
When a component is copied, the copy represents a new data object. Initially it looks like the original, or source object, but it is independent. Any subsequent changes to the copy have no effect on the original, and vice-versa.
But when a component is shared, no new data object is created. The same data object is merely made to appear in two or more locations. For a component that is shared, although it appears in two or more locations, there is only one data object. Therefore, any subsequent change to that object is reflected automatically and instantaneously in every other shared location.
Examples
That consequence might be exactly what you desire. For example, maybe you have a Task that is a component in more than one duty area (Function). It is exactly the same task, taught in exactly the same way. And so you choose to share the Task; you position it in two locations in the hierarchy, under each of the two duty areas. Any subsequent changes to the Task are reflected in both of its locations.
On the other hand, supposing you wanted that Task to appear in another duty area, but with the intent of customizing the Task—for the new location only. In other words, you want the Task to appear in an additional location, but it's not going to be identical. Perhaps the wording of the Task statement is to be slightly different. Or perhaps it will have different conditions or standards. Or perhaps it will not include the same set of children. In that case, it would be better to copy that Task, rather than share it.
Children are Also Shared
Finally, remember that when you share a hierarchy component, its children are shared as well. So, for example, if you share a Task, not only will that Task appear in more than one location, but so will any Elements and Skill/Knowledges that are children of the Task. After all, since sharing results in the same Task appearing in multiple hierarchy locations, it follows that you are going to see the same children when you expand the view of that Task.
To Move, Share or Copy:
1. Click and hold down your left mouse button on the text of the highlighted node(s) to be moved, shared or copied.
2. Drag the node(s) to the "target" node and release your left mouse button.
3. In the "Confirm Drop" window, it will ask, "What would you like to do?" Select either...
a.Move
b.Copy
c.Share
4. In the same window, the next question asks "Where to?" Select:
5. Click the OK button.
6. In the Move window that appears, click the Yes to All button.
VISION will not allow you to move, copy or share any item in a hierarchy window as a sibling above or below the top most item in the window (the "root" item). Also, VISION will not allow you to move, copy, or share program items as a child of a program training unit (any program item that has objectives sequenced into it) in a Program Hierarchy window.
 Keyboard Shortcuts for Move, Copy, and Share
View Only One Part of a Hierarchy
For a large hierarchy, you may want to view only one branch of your open hierarchy. In this case, you may wish to make your selected node the top node of the hierarchy. Your original hierarchy structure remains the same, but any nodes that are structurally above your selected node will not be visible.
To make a hierarchy component the Top Node, follow these steps:
1.Highlight the component to be made 'top node' by clicking on the text.
2.From the Main Menu (or right-click menu), select Node ![]() Make Top Node.
Make Top Node.
3.The hierarchy display will adjust so that the component you select will become the top node in the hierarchy display.
4.To reverse this procedure, click Expand to Top on the Node or right-click menu.
Note: When you make a component a top node, you are merely limiting your view to show just that component and its children. You are NOT unlinking it from the hierarchy.
Steps to use the Show Parent Feature
In very large hierarchies and if your component is shared, or linked, to more than one parent, Show Parents is a quick way to locate the parent(s) of your selected component. By using this feature, you can easily find and go to the parent(s) of your component.
The term "parent" refers here to any component that is immediately above a selected component, to which subordinate components are linked.
To use the Show Parent feature for any hierarchy component:
1.Highlight the node.
2.From the Main Menu (or right-click menu), click Node ![]() Show Parents.
Show Parents.
3.From the Show Parents window you can click on any one of the listed parent components and click the Go To Parent button.
