You can add several different types of content to objectives in VISION. After you have decided how to classify an objective, follow these directions to add content to it. These are they types of content you can add to an objective:
Change the Default Word or PowerPoint Template
Best Practices for Converting PowerPoint to MP4
Tips for Adding Content
 Add an Introduction or Summary to a Lesson
See Also
Should you 'Link' or 'Embed' pictures?
Steps for Developing Word Content
1.Double-click on the objective to open its properties, and click on the Content page.
2.Select a Classification from the drop-down menu. If you are unsure of which to select you can click the Advisor button for more information or select the Free Form classification.
3.Click the Word Actions drop-down menu and select "New Document".
4.Your Word document will open. Type or paste in content. When you are finished, save the document and close it.
5.VISION will confirm that you wish to save your changes. Click Yes.
6.Click on the Word Actions menu again and choose "Convert Document to HTML".
7.A Content box will pop up. Enter a title for the content so that you will be able to recognize it in the future. Click OK.
8.A pop-up will appear to confirm that the content was converted successfully, click OK.
 When you have finished adding the file, be sure to publish this content for online delivery.
Steps for Developing PowerPoint Content
1.Double-click on the objective to open its properties, and click on the Content page.
2.Select a Classification from the drop-down menu. If you are unsure of which to select you can click the Advisor button for more information or select the Free Form classification.
3.Click the PowerPoint Actions drop-down menu and select "New Document".
4.Your PowerPoint presentation will open. Type or paste in content. When you are finished, save the document and close it.
5.VISION will confirm that you wish to save your changes. Click Yes.
6.Click on the PowerPoint Actions menu again and choose "Convert Presentation to MP4 Video" (or convert to HTML if using Office 2010).
7.A Content box will pop up. Enter a title for the content so that you will be able to recognize it in the future. Click OK.
8.A pop-up will appear to confirm that the content was converted successfully, click OK.
You can still convert your PowerPoint content to HTML if you are using a version of Office no older than Office 2010. If not, you must convert it to MP4 instead.
 When you convert a PowerPoint to MP4, VISION will ONLY use the default values. To edit default values, see "PowerPoint Best Practices".
Change the Default Word or PowerPoint Template
The default PowerPoint template is provided by VDM as VISION\ContentTemplates\Powerpoint\VisionContentTemplate.potm. The default Word template is provided by VDM as VISION\ContentTemplates\Word\VisionContentTemplate.docx.
To use your company’s templates, save your template for PowerPoint in VISION\ContentTemplates\Powerpoint and Word in VISION\ContentTemplates\Word. VDM searches these directories for the PowerPoint template. If VDM finds a template other than the default, it will use that template.
Best Practices for Converting PowerPoint to MP4
If you are using Office 2010 you cannot publish PowerPoint as MP4. Instead, choose the 'Publish to HTML' option.
Consider the Following when converting PowerPoint to MP4:
•If your presentation contains an embedded video, the video might have problems playing correctly. Test your presentation if you embed any video and make adjustments as necessary. Note that you can also add a separate video content to the objective if you need to.
•Confirm that the MP4 movie renders your animations, slide transitions, and voice narration correctly.
•Be mindful of the file size of the MP4. When narration is used or you modify timing of the slides, the MP4 file can become large. Large video files will create undesirable network traffic when learners are viewing the video at the same time.
•Be mindful of instructional techniques that are appropriate in that media—there is very little learner interaction. A MP4 video can only be paused, replayed, or fast-forwarded.
•Adjust the timing of slides to allow learners enough time to read and digest the content.
MP4 Default Settings
The default settings that VISION will use to when converting PowerPoint slides to MP4 are:
•Use timings and narrations if present in the presentation file.
•Use 720 resolution for each slide.
•Use 10 seconds per slide (any timing overrides this value—see below).
•Use 30 FPS (frames per second—Microsoft recommends this setting).
Changing Default Settings
Note that changing the default settings will change the default settings for all PowerPoint generated from VISION. We recommend that you only change the default value for ‘FramesPerSecond’ or ‘SlideDuration’ and that you coordinate with other users so that all MP4 videos have a similar look and feel.
1.Navigate to the Windows registry at the following network location:
HKEY_CURRENT_USER\Software\FOCUS Learning Corp.\VISION\Content\PPTtoMP4

2.Open the Microsoft Windows program Registry Editor. If you are unsure of how to use this program or you do not have adequate permissions, contact your VISION Administrator. We recommend that you only change the default value for ‘FramesPerSecond’ or ‘SlideDuration’.
3.For each value you will see a window like this:
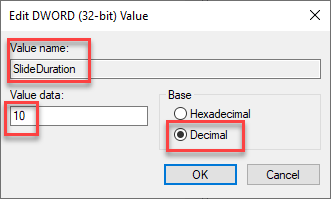
4.Be sure to show the value as a decimal before you change it.
5.Change the default ‘SlideDuration’ value to a length that is appropriate for your learners.
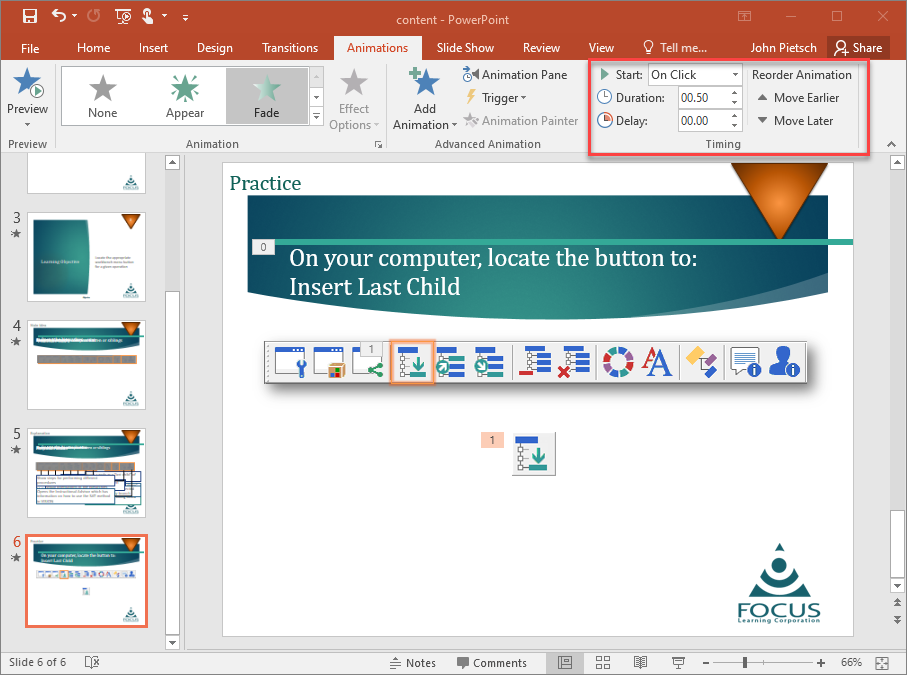
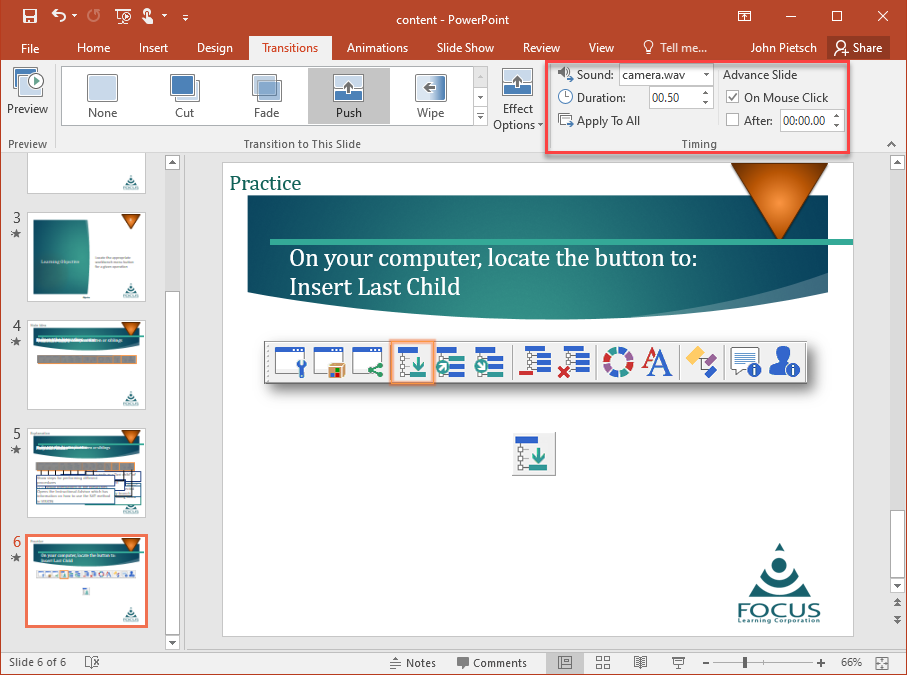
a.If you set a Timing for one or more slides in your presentation, VISION will use that value instead of the default value. Experiment with the Transition Timing possibilities in PowerPoint to accomplish your desired result.
6.Change ‘FramesPerSecond’ if you need to lower file size. The default, 30 fps, will result in a crisp video with smooth transitions. If you need a smaller file size, you can lower it to 24 fps (the standard for television and film) which will produce some motion blur.
7.There are only two practical reasons to modify the frame rate of your presentation. video that is crisp with smooth transitions then use a frame rate of 30 fps (the recommended rate by Microsoft and is the default used by VISION). Otherwise, use a frame rate of 24 fps (resembling a TV show) that produces more motion blur, which is considered the standard film look.
Note: if you intend on imbedding video(s) in your presentation consider the Frame Rate that the video used; this could cause in part undesired results in the MP4.
Video File Size
Consider the options of Narration, Transition Timing, Animation Timing, and Frame Rate if you are concerned with your file size. Increasing the frame rate increase the size of the video because it increases the number of images displayed in each second. Using narration can dramatically increase the size of a video as well. If you plan on using large video files, ensure that you have enough storage space and bandwidth on your network.
When you have finished adding the file, be sure to publish this content for online delivery.
See Also
Classifying Instructional Objectives
Add Video, HTML, PDF, AICC, or Web Content