Add User Records Manually
Follow these steps to add a new user record to the VISION Learning Station:
1.On the Main Menu, click on Administration, and then the Users tab.
2.Click the Add User button to bring up a blank user record.
3.Select the correct organization for the user if it is not already selected.
4.Enter the Username/Employee Id and press User Lookup. If the username matches one that VISION already knows, then it will pre-fill some fields with the information it has. If the user information comes from a read-only source like Active Directory, then some of the fields will be non-editable. All required fields are marked with a red asterisk.
5.Click the Add User button to save the new record.
Import User Records into VLS from Excel
Set up the Spreadsheet
1.Create an Excel spreadsheet on your computer.
2. The spreadsheet should consist of a single sheet with the first row containing column headers as follows:
a. Username
i. Always required.
ii. If VISION is integrated with Active Directory, and this field matches an Active Directory username, the VISION account will become linked to the Active Directory account, and the First_Name, Last_Name, Email and Password fields will be controlled by Active Directory and cannot be changed.
b. First_Name
i. Required when creating VLS user accounts that are not linked to Active Directory accounts.
ii. Ignored for accounts that are linked to Active Directory.
c. Last_Name
i. Required when creating VLS user accounts that are not linked to Active Directory accounts.
ii. Ignored for accounts that are linked to Active Directory.
d. Email
i. Required when creating VLS user accounts that are not linked to Active Directory accounts.
ii. Ignored for accounts that are linked to Active Directory.
iii. When VISION is integrated with Azure AD, the email address is used to identify accounts, so each account must have a unique email address.
e. Password
i. This field is always optional, and may be omitted from the spreadsheet.
ii. Ignored for accounts that are linked to Active Directory or Azure AD.
iii. If not specified when creating VLS user accounts that are not linked to Active Directory or Azure AD, a random password will be assigned. Users can then use the “Forgot Password” feature to set their own passwords.
f. Expiration_Date
i. This field is always optional, and may be omitted from the spreadsheet.
ii. Please enter learner expiration dates in the format MM/DD/YYYY.
g. UserDefined1 – always optional. For customer-defined use.
h. UserDefined2 – always optional. For customer-defined use.
i. UserDefined3 – always optional. For customer-defined use.
j. Can_Be_Proctor
i. This field is always optional, and may be omitted from the spreadsheet.
ii. Supported values for this field are 0, 1, TRUE, FALSE, ON, OFF, YES, NO.
iii. If not specified when creating VLS user accounts, will default to FALSE.
Examples
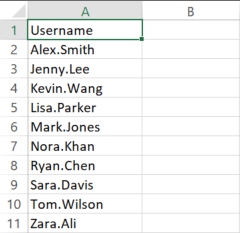
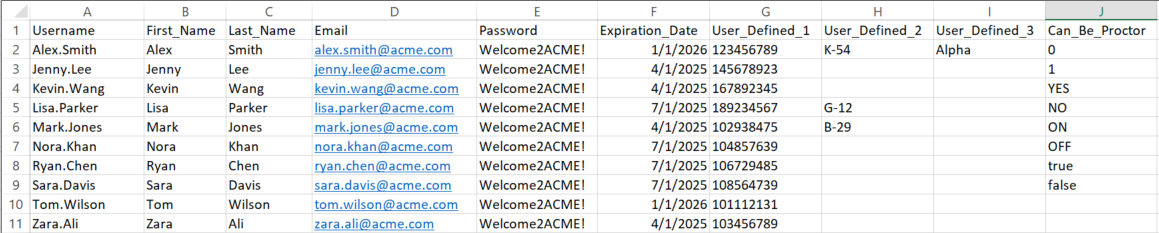
Add New Users (non-domain accounts). When adding non-domain users to VISION Learning Station, the following example displays the required fields that should be in the .xls file. Should you wish to include other fields, they can be defined as additional columns. If VISION is integrated with Active Directory, for those usernames that match Active Directory accounts, the first_name, last_name and email fields will be ignored, and the user will be created using values from Active Directory for those fields. If VISION already contains accounts matching the usernames, and VISION is not integrated with Active Directory, for those accounts, the first_name, last_name and email values will be updated using the values in the spreadsheet if they are different than the existing values.

Add New Users (domain accounts). Adding Active Domain or Keycloak users requires only the domain username be included in the import. VISION's connection to Active Directory or Keycloak will fill in automatically the user's first_name, last_name, email. Should you wish to include other fields, they can be defined as additional columns.
 Note that VISION Learning Station will modify existing records if they are included in an import. See Use the Import to Modify Existing User Records
Import User Records
Follow these steps to import user records into the VISION Learning Station:
1. On the Main Menu, click on VLS Utilities.
2. Click Import/Update Users.
3. Click the Choose File button to select your file. After locating and selecting the file, click the Open button in the file explorer window.
4. Click the Preview Import button. This will display a page where you will be given an opportunity to select the Organization and Security Access for the users. These will apply to ALL the users for this import, so be sure to import users who will be in different organizations or who have different security roles separately. The Import/Update Users (Preview) page will also show the planned changes that will occur when the import is performed.
5. The User Status column in the preview table indicates the overall status for each import record as follows:
a. New – A new VISION and VLS user account will be created that is not linked to Active Directory.
b. Existing (Domain) – The existing Active Directory account will be linked to a new VISION/VLS user account.
c. Existing (VISION) – The existing VISION account will be used for the VLS user account and will be updated as specified.
d. Existing (VLS) – The VLS account for the user already exists and will be updated as specified.
e. Invalid – This record will not be imported because one or more required fields are missing values.
6. Each of the fields in the preview table is color-coded as follows:
a. White – Indicates unspecified or unchanged attribute.
b. Green – Indicates new value for attribute.
c. Yellow – Indicates a changed value for attribute.
d. Red – Indicates a rejected change for an attribute.
7. Many of the fields in the preview table will show additional information when hovered over with the mouse. For fields that are being updated, the original value is shown by hovering over the field.
8. Please examine the preview table closely to ensure that the planned changes are as expected. If you find any discrepancies, fix the issues in the spreadsheet and return to the beginning of the Import/Update Users process. 9. Select the Organization, Role (Security Access), and Email options for the batch of learners.
10. Click the Import Learners button.
11. Review the summary of results on the next page.
Modify User Records from Excel
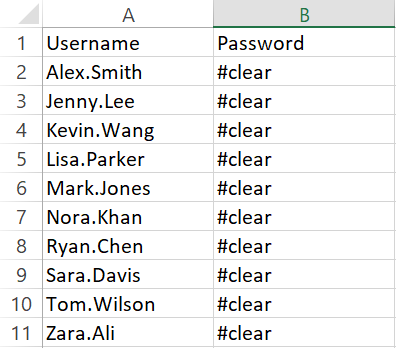
The import utility can also be used to batch modify already existing learners. Values may be set, modified, or cleared from the user records. To clear a value from a record, use the string #clear to indicate the value should be removed from the user's record.
Examples
General Updates. Updates to user records may be made by simply entering in a new value for those fields that are to be updated. Leaving a field blank will leave the existing record in place. Supplying a value will add any new record, or change the record already in place.
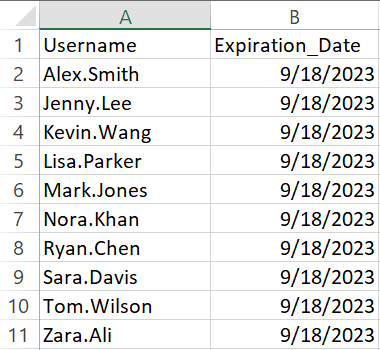
Batch Expire Learners. Suppose you need to batch expire a long list of learners. Rather than individually locate their learner account, edit properties, set an expiration date and save, create an .xls file with with the usernames and desired expiration dates defined.
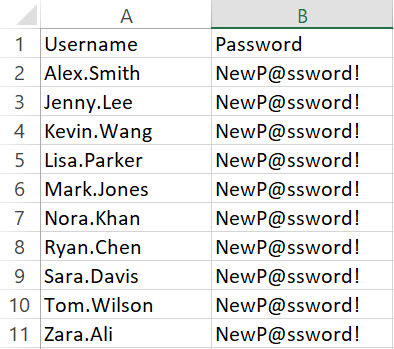
Clear Passwords. Use the #clear command to assign new, randomized passwords to the defined users. No one will know the password except the users to whom it will be sent.
Reset Passwords. To change a user's password to a known, non-random password, supply the new password in the password column.
Schedule Automatic Import
Users may be imported on a schedule, configured on the Import Users Utility. As with the manual method of importing users, the XLS file containing the data to be imported must be stored in a folder accessible to the VLS.
Required fields
The automated user import spreadsheets must comply with the same requirements as for the interactive User Import/Update process. Please see section Set up the Spreadsheet above for details.
Steps
1. On the Import/Update Users utility page, click the "Schedule Automatic Import" button in the top right corner.
2. Fill out the Schedule Automatic User Import page with the following settings:
a. Enable Automatic Import: Checking the box will cause, once the import schedule is saved, the import to run. If you are unsure about the final settings, leave this unchecked until it is complete.
b. Path to Import Files: The Full path to the directory containing the import files. This path must be one that exists on the VISION Learning Station server, or is a network location to which the VISION Learning Station server has read/write permissions.
c. Default Organization for Imported Learners: Users will be assigned this organization as their primary organization.
d. Send VLS Welcome Email to New Learners: Check to send the email, leave unchecked to send no email.
e. Frequency of Import: May be specified in minutes, daily, weekly, monthly
f. Import Start Date: Date on which to begin running the scheduled import.
g. Import Start Time: Time of day to begin running the scheduled import.
3. Click Save Changes to begin using the scheduled user import.