Reports and documents can be generated using the operations on the VISION Main Menu.
The Difference between Reports and Documents
Steps for Getting Reports and Documents
See Also:
The Difference between Reports and Documents
You will notice that all of the reports in VISION are separated into two categories: Reports and Documents.
•Reports are usually centered on results of various stages of the instructional analysis and design process. They reveal the condition or status of the project database.
•In general, documents are actual products that you could give a trainee, instructor or worker. Study guides, lesson plans and procedures are examples of documents.
To generate a report to see task analysis results, you would pick the Reports category. To generate a lesson plan, you would pick the Documents category.
There are some reports and documents that defy the definition above, but after using the Reports and Documents categories for a while, you'll learn them easily.
Note that the distinction between Reports and Documents is only conceptual, not functional. A report and a document can actually generate the same output. In fact, a report can be easily relocated to the Documents list, and vice-versa.

 Tests are not listed in either the Reports or Documents category. Tests, or exams, are generated from controls located on the Test Search window.
Steps for Getting Reports and Documents
Microsoft Office Documents differ from the traditional VISION Reports and Documents, which generate RTF documents. The Microsoft Office Document menu item leads to a different interface from the one discussed here.
1.On the Main Menu, click on Outcomes and then VISION Reports or VISION Documents.
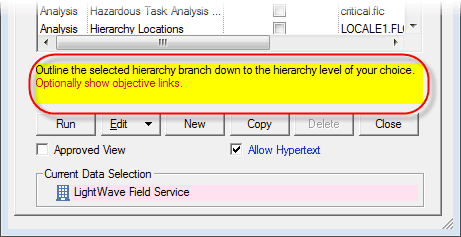
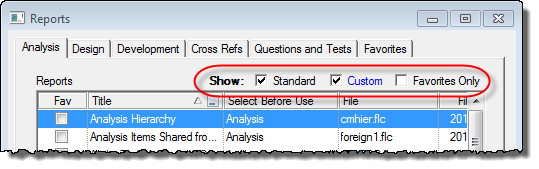
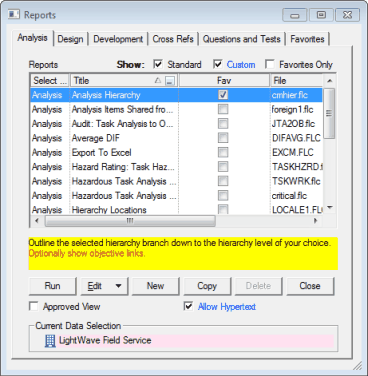
2.Select one of the category tabs to indicate which category of project reports or documents that you want. The report titles for each category are listed in alphabetical order.
3.If the report or document needs a starting point, VISION requires that you have already selected that starting point before clicking the Run button. The appropriate starting point is listed in the Select Before Use column, next to the report title. If you have not clicked on the appropriate starting point, do so now.
4.Click the Run button or double-click on the report's title.
5.After clicking Run, a window may appear with more options. Choose any applicable options and click the OK button to run the report.
6.The report is generated. Print the report by selecting File and then Print from the Main Menu.
7.You can also save the report as an RTF, DOCX, or PDF file. Click Save as, then choose Save or Save and Protect (save as an encrypted zip file), and select your file type.
Search Report
An additional type of report is the Search. This can be accessed from the Main Menu by selecting Search, and then choosing the type of search that you want to use. There are three kinds of searches that you can perform.
|
This is very similar to running a report or document. The difference is in the output, which is a search result list instead of a text document. |
|
This helps you find nodes in the hierarchy branch that have specific text or that are linked to a specific table item. |
|
Use this to find a single data object having the ID you enter. The ID can be one of three kinds: User- Defined ID, System ID, or Cross Reference Number. |


Remember that generating a report requires that you pick the data start point BEFORE running the report. This is easiest if you first open the hierarchy that contains the starting point for the report or document. (Some reports don’t require any starting point at all—the ones that pertain to the whole project.)