When your instructor has placed a “Hold” in a lesson, you cannot proceed though the lesson past the Hold point until your instructor “releases” it. Your instructor will give you instructions on what to do when you come to the hold, and once you follow them, your instructor will be informed.
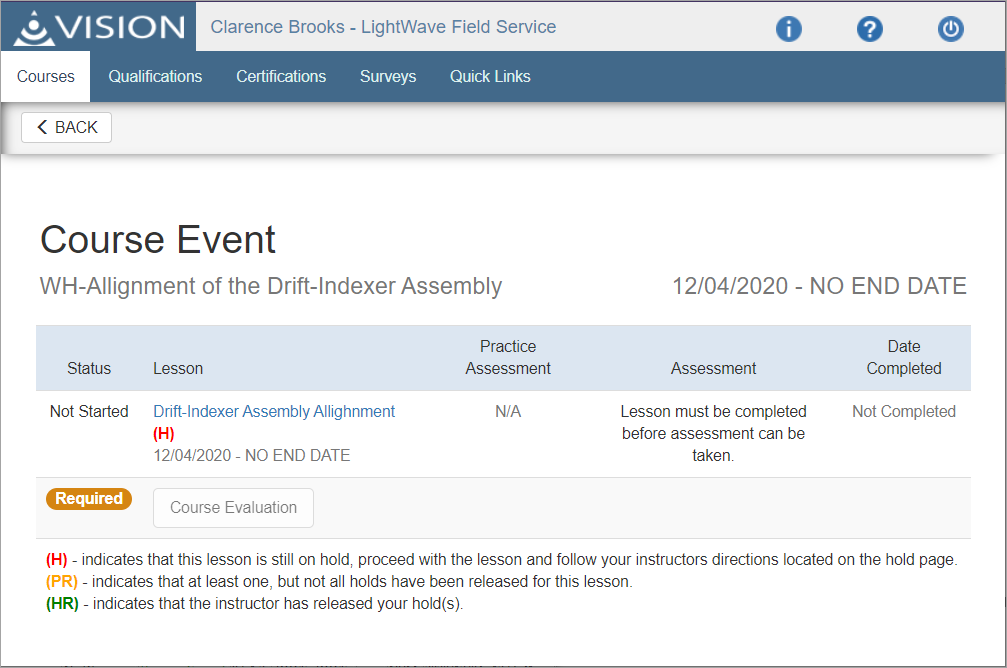
1.When a lesson has a hold in it, you will see it indicated with a red H like this:
2.When you reach the hold in the lesson, you will come to a “Hold” page, past which you cannot progress.
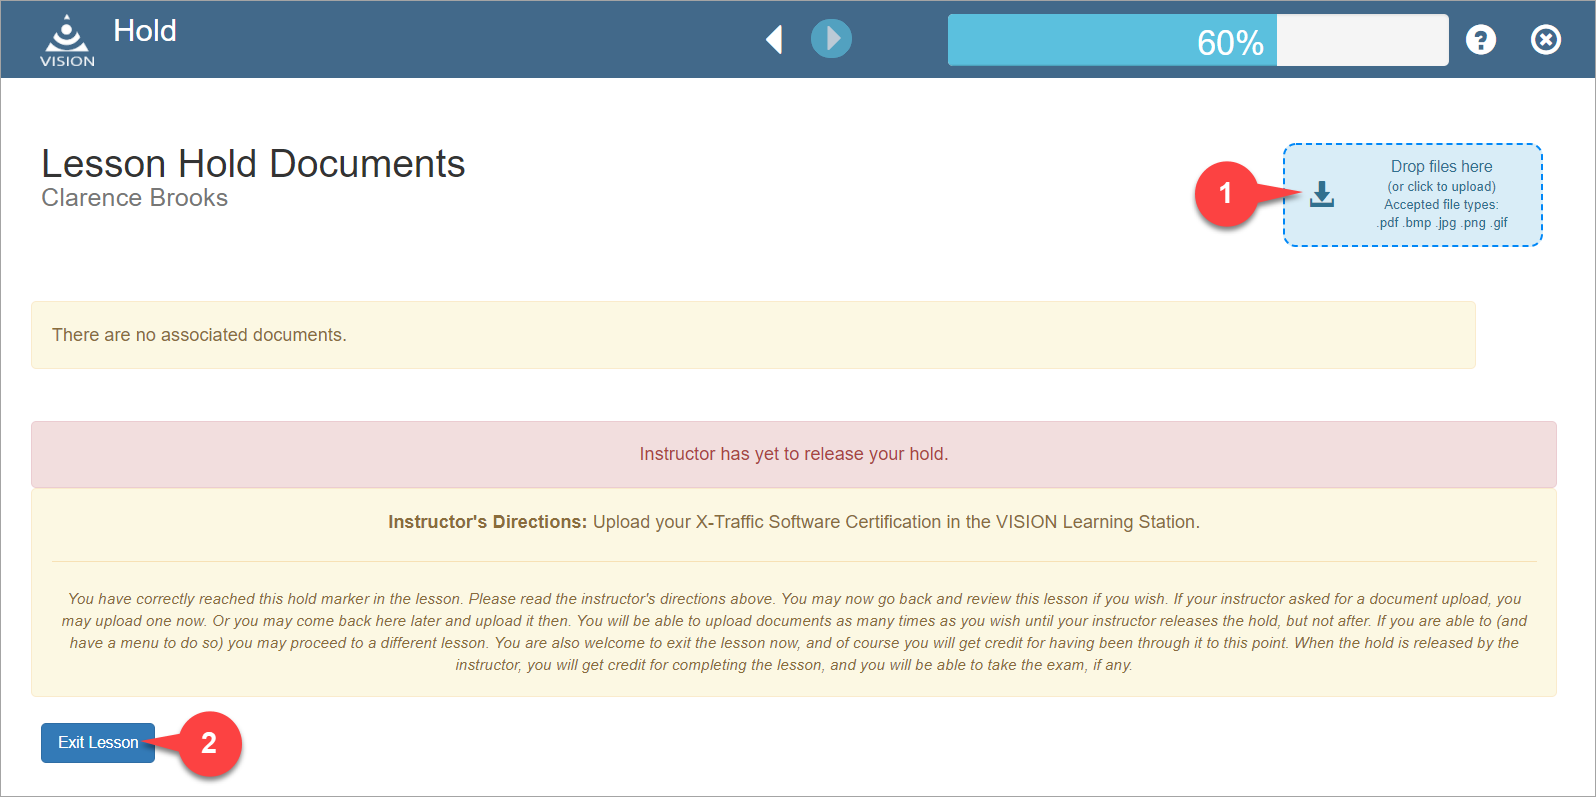
3.If you have your document(s) ready, you can drag them onto the "Drop files here" area, or click on the "Drop files here" area to browse for them. If your document(s) are not ready, you can exit and then return to the lesson when you have them. Note that you can upload more than one file. Do not use any special characters in the file name, as these can cause issues with saving it.
4.After uploading, click the Exit Lesson button. You will not be able to proceed until the instructor lifts the hold.
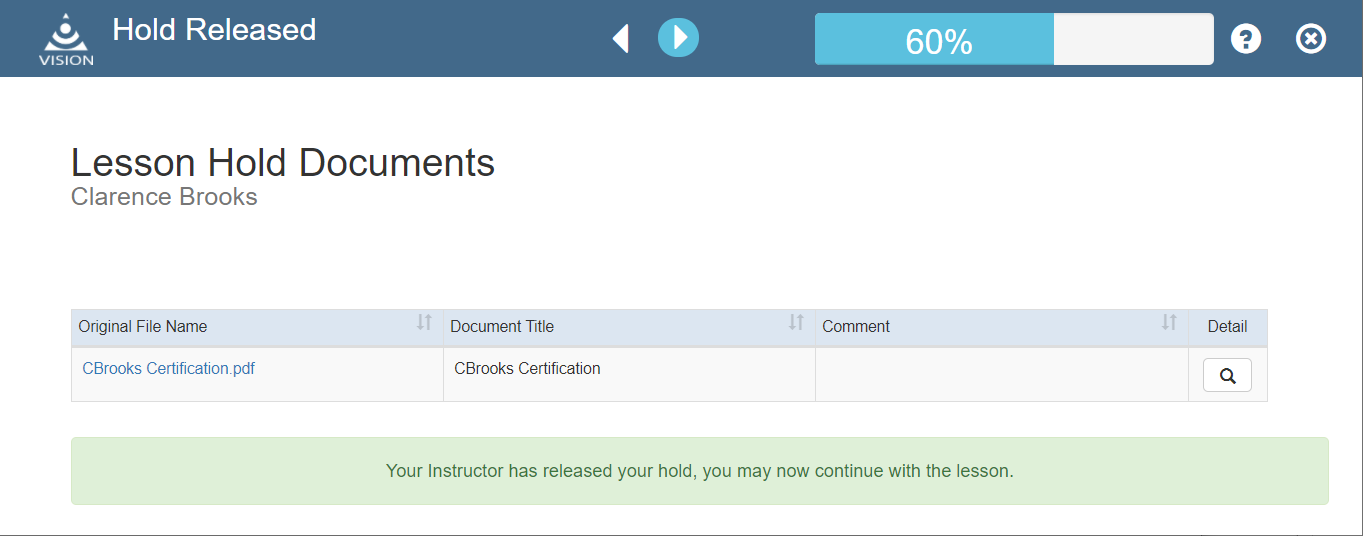
5.Once this has happened, the VLS will send you an email and you can log in and resume the lesson. The lesson will now have a green HR icon for “Hold Released”.

6.The Hold and your uploaded documents will remain in the lesson so you can review them if you need to, as in the image below. This time the hold will not prevent you from moving forward in the lesson. (Note - if you remain on the Hold page while the instructor lifts the hold (i.e., do not exit and log back in), simply refresh the Hold page after the hold has been lifted and you will see Hold Released as shown here.)
What if I Need to Upload Another Document?
Once your instructor has released the hold, you cannot upload any more documents to it. However, if you need to upload additional documents for your instructor, you can upload them to your User Record and your instructor will be able to view them there.
To upload documents for you user record, follow these steps:
1.Click on Quick Links.
2.Click on My Information.
3.Click on Learner Documents.
4.Your documents (if any) are listed. To upload new documents, either drag them onto the "Drop files here" area, or click on the "Drop files here" area to browse for them.